The Master’s Blueprint: A Technical Guide to Building and Operating the Ultimate Establishment in Tavern Keeper
In the intricate world of Tavern Keeper, success is not merely measured by the amount of ale poured, but by the mathematical efficiency of your floor plan and the psychological manipulation of your patrons. This is a game where the placement of a single candle or the distance between a lard barrel and a frying pan can determine whether your business flourishes or descends into a bankrupt den of brawls. To truly master the simulation, one must look past the charming aesthetics and understand the underlying systems of pathfinding, thermal dynamics, and social clustering. This guide provides a deep technical dive into the "How-To" of high-level tavern management, transforming you from a simple barkeep into a legendary tycoon of the hospitality industry.
1. How to Blueprint for Peak Efficiency: Minimizing Pathfinding Friction
The foundation of a profitable tavern lies in the reduction of "Travel Latency." Every second a staff member spends walking is a second they aren't generating revenue. When you first open your construction tab, you must view the floor as a series of nodes. The most effective strategy is the "Kitchen-Cellar Nexus." By placing your food preparation area and your drink storage in a back-to-back configuration with a shared central wall, you minimize the distance carriers must travel to resupply the front of the house.
To further optimize movement, you must understand the "Collision Avoidance" logic of the game’s AI. If your hallways are only one tile wide, staff members will constantly stutter-step to let each other pass, creating a bottleneck. Technical players utilize the "Artery Layout," where main thoroughfares are two or three tiles wide, while seating "nooks" are kept narrow. This forces the pathfinding algorithm to prioritize clear lanes for servers, ensuring that a hot meal reaches the table before the "Patience Meter" of the customer begins to decay.
2. How to Manage Thermal Zones: Heat Dissipation and Patron Comfort
One of the most complex hidden layers in Tavern Keeper is the temperature simulation. Every hearth, oven, and even a cluster of patrons generates heat, which dissipates through the air and is blocked by walls. To keep your patrons staying longer (and spending more), you must maintain a "Comfortable" temperature range. If a table is placed directly against a roaring fireplace, the "Overheating" debuff will trigger, causing the customer to leave immediately after their first drink.
Advanced Climate Control Tactics
- The Buffer Zone: Place decorative tapestries or bookshelves between fireplaces and dining tables to act as thermal insulators.
- Kitchen Venting: Use windows or specific ventilation tiles in the kitchen to prevent the heat from the ovens from bleeding into the main hall and upsetting the customers.
- Seasonal Adjustment: During winter events, you must move your portable braziers toward the entrance to counteract the "Cold Draft" mechanic that occurs every time the front door opens.
3. How to Construct the Perfect Cellar: Temperature and Fermentation Logistics
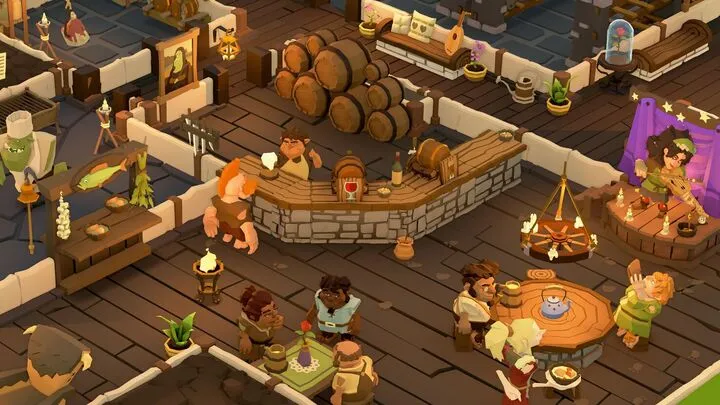
The cellar is the heart of your beverage empire, and its construction requires more than just digging a hole. In Tavern Keeper, certain high-tier ales and wines have "Maturation Requirements" that are influenced by light and heat. A cellar that is too bright or too warm will cause your expensive vintages to spoil, turning a potential goldmine into vinegar. You must use thick stone masonry for cellar walls, as it has the highest "Thermal Resistance" in the game's material database.
Furthermore, you should organize your barrels using the "FIFO" (First-In, First-Out) logistical method. By placing your newest barrels at the back of a racking system and using a "Service Corridor" for your barmaids, you ensure that the most aged (and thus most valuable) products are served first. Utilizing dedicated "Cold Storage" rooms for specific spirits allows you to charge a premium price, as the "Chilled" modifier adds a significant multiplier to the patron's satisfaction score upon consumption.
4. How to Optimize the Kitchen Workflow: From Lard to Plate
Kitchen management in Tavern Keeper is essentially a factory simulation. Each dish has a "Recipe Chain" consisting of Prep, Cooking, and Plating. To maximize throughput, you must arrange your stations in a "U-Shape" or "Assembly Line" configuration. The Butcher Block should be adjacent to the larder, which should lead directly to the Stove, ending at the Serving Hatch. This minimizes the "Pivot Time" for your chefs, allowing one high-skill worker to manage multiple dishes simultaneously without moving their feet.
Essential Kitchen Layout Checklist:
- The Assembly Line: Raw Storage -> Prep Station -> Heat Source -> Plating Table.
- Water Access: Place a well or water barrel within two tiles of the soup station to eliminate long hauls for liquid ingredients.
- Tool Racks: Ensure every station has a dedicated tool rack to provide the "Equipped" speed bonus to the chef.
5. How to Manipulate Social Clusters: Seating Density vs. Social Energy
Patrons don't just sit anywhere; they seek "Social Energy" based on their character traits. Adventurers prefer communal long-tables near the hearth, while Nobles seek isolated booths with high "Privacy Ratings." To master seating, you must balance "Density" (how many people you can fit per square meter) with "Atmosphere." Overcrowding a room creates "Noise Pollution," which can trigger the "Irritable" trait in certain patrons, eventually leading to brawls.
To maximize revenue, you should implement "Tiered Seating." Use cheap stools for high-turnover customers near the bar and luxurious cushioned chairs for the "Lingerers" in the back. The "Lingerers" are your biggest spenders, as they will order multiple rounds of drinks and expensive meals as long as their "Atmosphere" bar remains high. By placing "Social Anchors" like a bard’s stage or a trophy display in the center of these zones, you generate a passive mood-buff that offsets the cost of expensive menu items.
6. How to Recruit and Specialize Staff: Trait Synergy and Fatigue Management
Your staff are not interchangeable units; they are a collection of traits that must be harmonized. When hiring, you must look for "Synergistic Pairs." A cook with the "Sturdy" trait (reduced fatigue) should be paired with a waiter who has the "Social Butterfly" trait (increased tip chance). This allows the kitchen to stay open longer while the front-of-house maximizes the gold-per-visit.
Managing fatigue is a technical challenge of "Shift Overlapping." You should never have all staff take breaks at the same time. Use the "Schedule Tool" to create a staggered rest pattern. A well-designed staff room with high-quality beds and a private fireplace will restore energy 25% faster than a basic one, allowing you to run a leaner crew with higher productivity. Specialized staff roles, such as a dedicated "Glass Polisher" or "Firewood Hauler," can be assigned to low-skill workers to free up your high-skill masters for the complex tasks of brewing and cooking.
7. How to Deter and Handle Brawls: The Security Grid
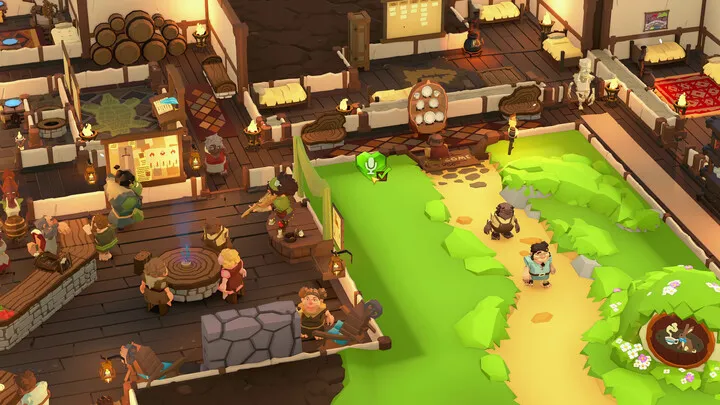
In Tavern Keeper, brawls are an expensive disaster that destroys furniture and scares off elite patrons. Deterrence starts with "Lighting Levels." Dark corners have a higher "Mischief Rating," which increases the probability of a fight breaking out. By placing high-lumen lanterns in high-traffic areas, you reduce the base aggression of your customers. However, lighting alone is not enough; you must also manage the "Alcohol Potency" of your menu.
Security Response Protocol
- The Bouncer’s Reach: Place the security desk near the center of the tavern, not the door. This reduces the "Response Time" to any point on the map.
- The Calm-Down Zone: If a patron’s aggression is rising, have a staff member with the "Diplomat" trait offer them a free "Low-Alcohol" snack. This resets their anger meter without losing the customer.
- Furniture Reinforcement: In the later game, upgrade your chairs to "Heavy Oak." This prevents them from being broken during a scuffle, saving you thousands in repair costs over time.
8. How to Master the Economy: Price Elasticity and Seasonal Menus
Your menu prices should never be static. Tavern Keeper features a "Supply and Demand" engine that fluctuates based on local events and seasons. During a "Grain Blight" event, the cost of beer will skyrocket. If you don't adjust your prices, your margins will vanish. Conversely, during a "Harvest Festival," the volume of customers will triple, allowing you to lower prices slightly to maximize total volume and clear out your older stock.
To truly optimize, you must understand "Price Elasticity" for different social classes. A peasant is highly sensitive to price changes and will leave if ale increases by even a few coppers. A Knight or a Wizard, however, has high "Wealth Tolerance" and will pay double for a "Legendary" grade meal. By creating a "Split Menu"—offering both "Budget Swill" and "Royal Nectar"—you can capture the entire market spectrum without alienating any demographic.
9. How to Use Decoration for Mechanical Gain: Prestige and Buffs
Decorations in this game are not just for show; they provide "Mechanical Auras." Every rug, painting, and trophy adds to your "Prestige Score," which determines the tier of heroes and nobles that visit your tavern. However, you must avoid "Clutter Overlap." Placing two identical paintings in the same room provides a "Diminishing Return" on prestige. Instead, you should focus on "Thematic Sets" (e.g., the "Hunter’s Set" with deer heads and wolf skins) to trigger hidden set bonuses.
Strategic Decoration Placement:
- The Entrance Flex: Place your highest-prestige items near the front door. This sets the "Expectation Level" of the patron the moment they walk in, allowing you to charge higher base prices.
- Acoustic Dampeners: Use curtains and rugs in high-noise areas (near the kitchen or the stage) to reduce the "Noise Penalty" for nearby diners.
- Comfort Multipliers: Place plants and flowers near windows. The "Natural Light" plus "Flora" combo provides a massive boost to the "Patience" stat of waiting customers.
10. How to Scale and Expand: The Multi-Floor Masterplan
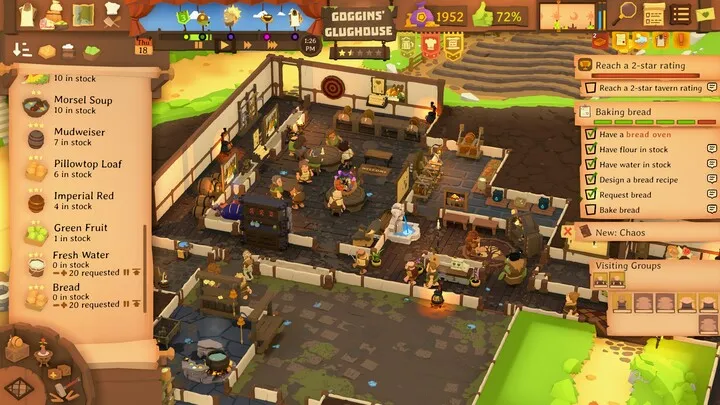
As your reputation grows, you will need to expand. The "Multi-Floor Expansion" is the ultimate test of your logistical skills. The most common mistake is placing all services on every floor. Instead, you should "Zone" your tavern. The ground floor should be a high-volume, high-noise "Common Room" for peasants and travelers. The second floor should be a "Premium Lounge" for elites, featuring its own dedicated bar but sharing the ground-floor kitchen via a "Dumbwaiter" system.
By using a dumbwaiter, you can transport food vertically without your chefs having to climb stairs, which is the slowest movement animation in the game. This vertical integration allows you to maintain a massive seating capacity with a relatively small, highly efficient kitchen staff. As you reach the endgame, your tavern should function like a well-oiled machine, where every movement is purposeful and every copper is accounted for in a grand design of hospitality and profit.
Conclusion
Mastering Tavern Keeper requires a transition from being a decorator to being an engineer. It is a game that rewards those who pay attention to the micro-details of pathfinding, the thermal currents of a room, and the socio-economic status of every patron who walks through the door. By implementing a central larder-kitchen nexus, managing your thermal zones with precision, and utilizing tiered seating and menus, you can build an establishment that stands the test of time. Your tavern is a living ecosystem; treat it with the technical respect it deserves, and you will find that the gold flows as freely as the ale. The path to becoming the ultimate Tavern Keeper is paved with efficient blueprints and happy, high-paying customers.

